Working with initiatives
An initiative is a folder for a big effort inside your guild. It gathers the projects, documents, and tools for that effort, and it's where you decide who's involved. This guide covers creating initiatives, adding people, and setting up roles.
New to the idea? See How Initiative is organized first.
Creating an initiative
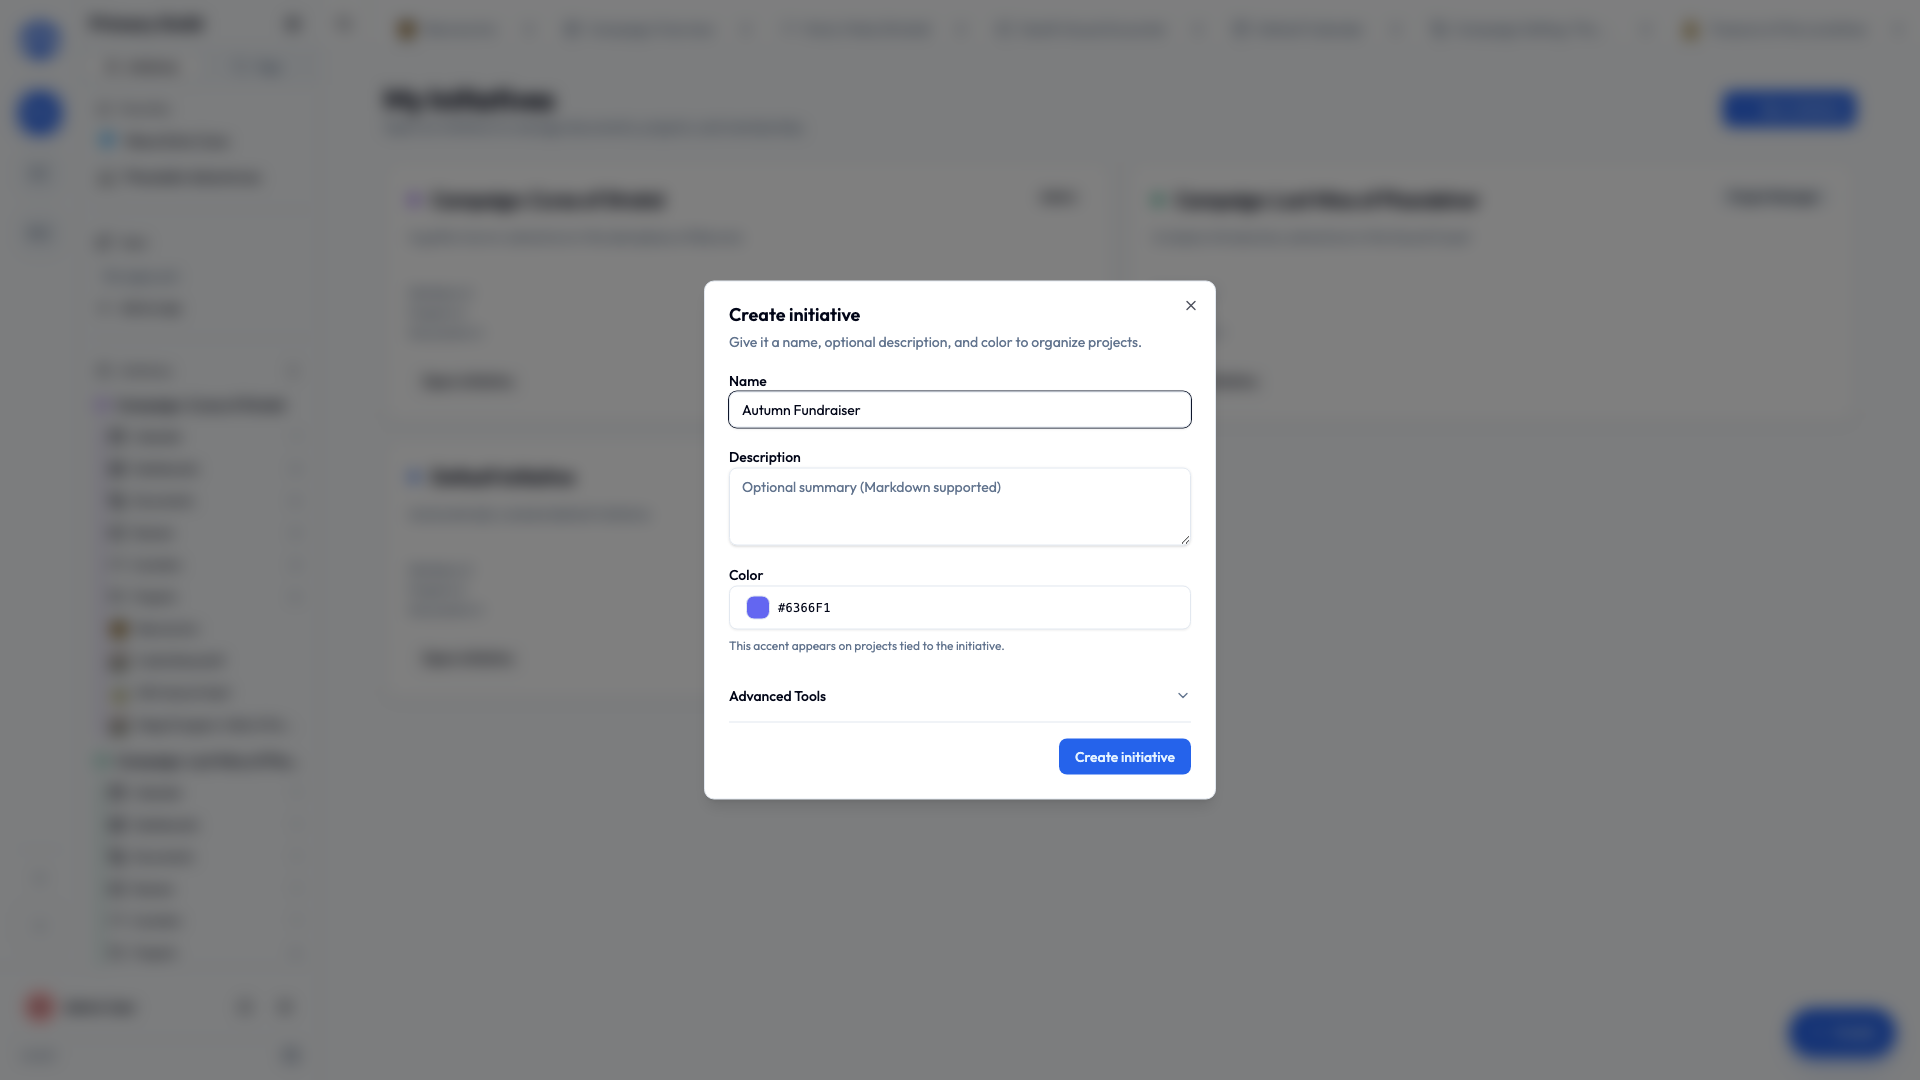
- In the sidebar, find Initiatives and choose Add initiative (or New initiative).
- Give it a name — usually the effort it represents ("Spring Play," "2026 Budget," "Onboarding").
- Pick a color. This color appears alongside the initiative's projects, so groups are easy to tell apart at a glance.
- Optionally add a description (you can use simple Markdown formatting).
- Create it.
Your new initiative appears in the sidebar. Click to expand it and you'll see its projects and documents.
The Default Initiative
Every guild starts with a Default Initiative so there's always somewhere to begin. You can rename it and use it like any other — but it can't be deleted, so your guild is never left without a home for new work.
The initiative dashboard
Clicking an initiative's title in the sidebar opens its dashboard — an overview of that effort: how its projects are progressing, upcoming tasks, and recent activity. It's a quick way to see how the whole initiative is doing.
Adding members
An initiative is only visible to its members. To bring people in:
- Open the initiative and go to its settings → Members.
- Add people from your guild.
- Give each person a role (see below).
People who aren't members of an initiative simply don't see it — it's not hidden behind a "no entry" sign, it's just not there for them. This is how an initiative keeps sensitive work private to the people involved, even from other members of the same guild.
Roles and what they unlock
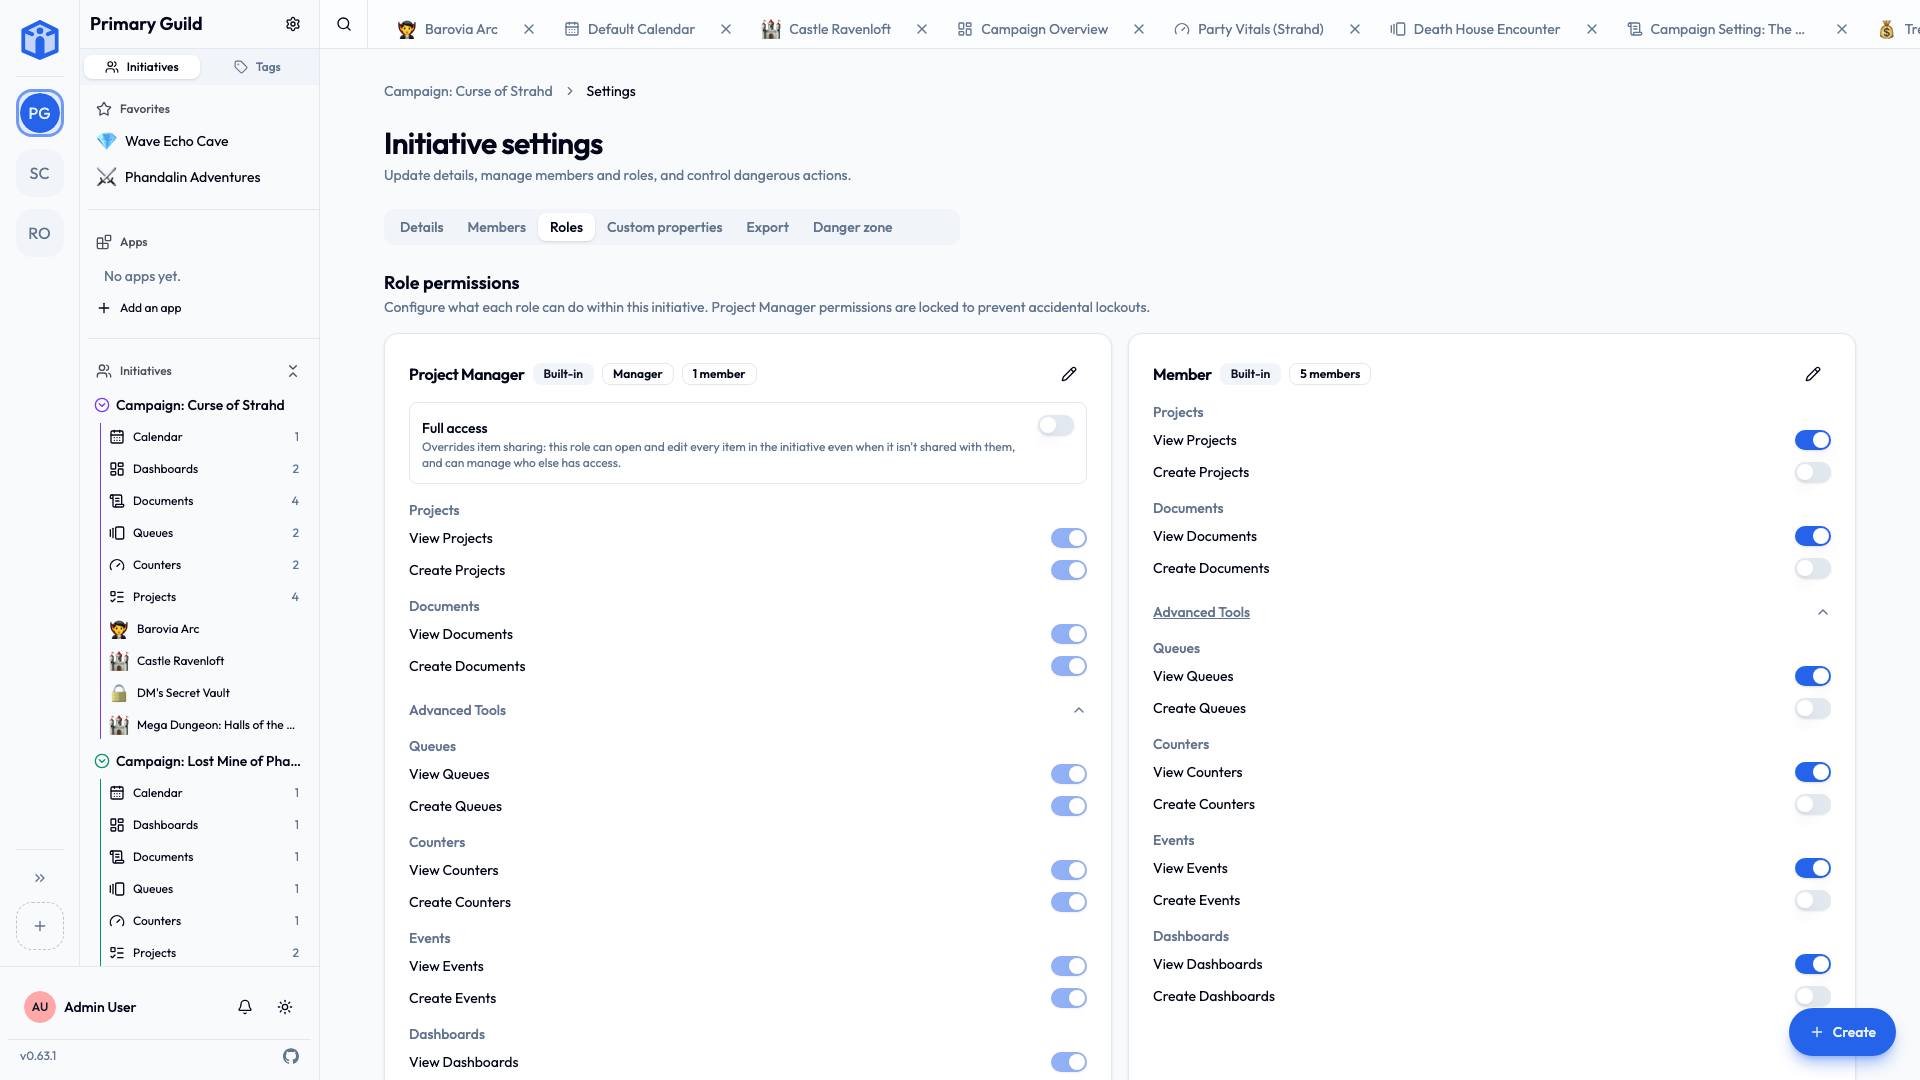
Within an initiative, each member has a role. A role decides which kinds of tools that person can use here — for example, whether they can create projects, or only view them.
Initiative comes with a Manager role (think project lead) whose permissions are fixed, and you can create your own roles on top — like "Coordinator," "Volunteer," "Client," or "Guest" — each with its own mix of permissions. Name them after how your group actually talks about itself, not after anything Initiative expects.
Permissions are grouped by tool:
| Tool | Typical permissions |
|---|---|
| Projects | View, Create |
| Documents | View, Create |
| Queues | View, Create |
| Counters | View, Create |
| Events (calendar) | View, Create |
| Dashboards | View, Create |
So you might give "Volunteer" members permission to view projects and documents but not create them, while "Coordinator" can create everything.
There's a full walkthrough of roles and how they combine with sharing in Initiative roles.
Managers can see everything
The built-in Manager role has full access to the whole initiative — its members reach every project and document without each being shared with them. This is unique to Manager; custom roles don't get it. Give the Manager role only to people who genuinely need the whole picture.
Initiative settings
Open an initiative's settings to find:
- Details — name, color, and description.
- Members — who's in, and their roles.
- Roles — create roles and set their permissions.
- Danger zone — archive, unarchive, or delete the initiative.
Archiving vs. deleting
- Archive tucks an initiative away when an effort is finished, without losing anything. Archived initiatives are hidden from the main view but can be brought back at any time. Good for "the spring play is over, but keep the records."
- Delete sends the initiative — and everything in it — to the guild's Trash, where an admin can still restore the whole thing until the retention period ends. After that, it's gone for good.
Related
- Projects & tasks — the work inside an initiative.
- Documents — shared knowledge inside an initiative.
- Initiative roles — roles and sharing, in depth.