Projects & tasks
A project is a board for tracking work, and tasks are the individual to-dos on it. This is where most day-to-day work happens. This guide covers creating projects, adding and organizing tasks, and the handy extras.
Creating a project
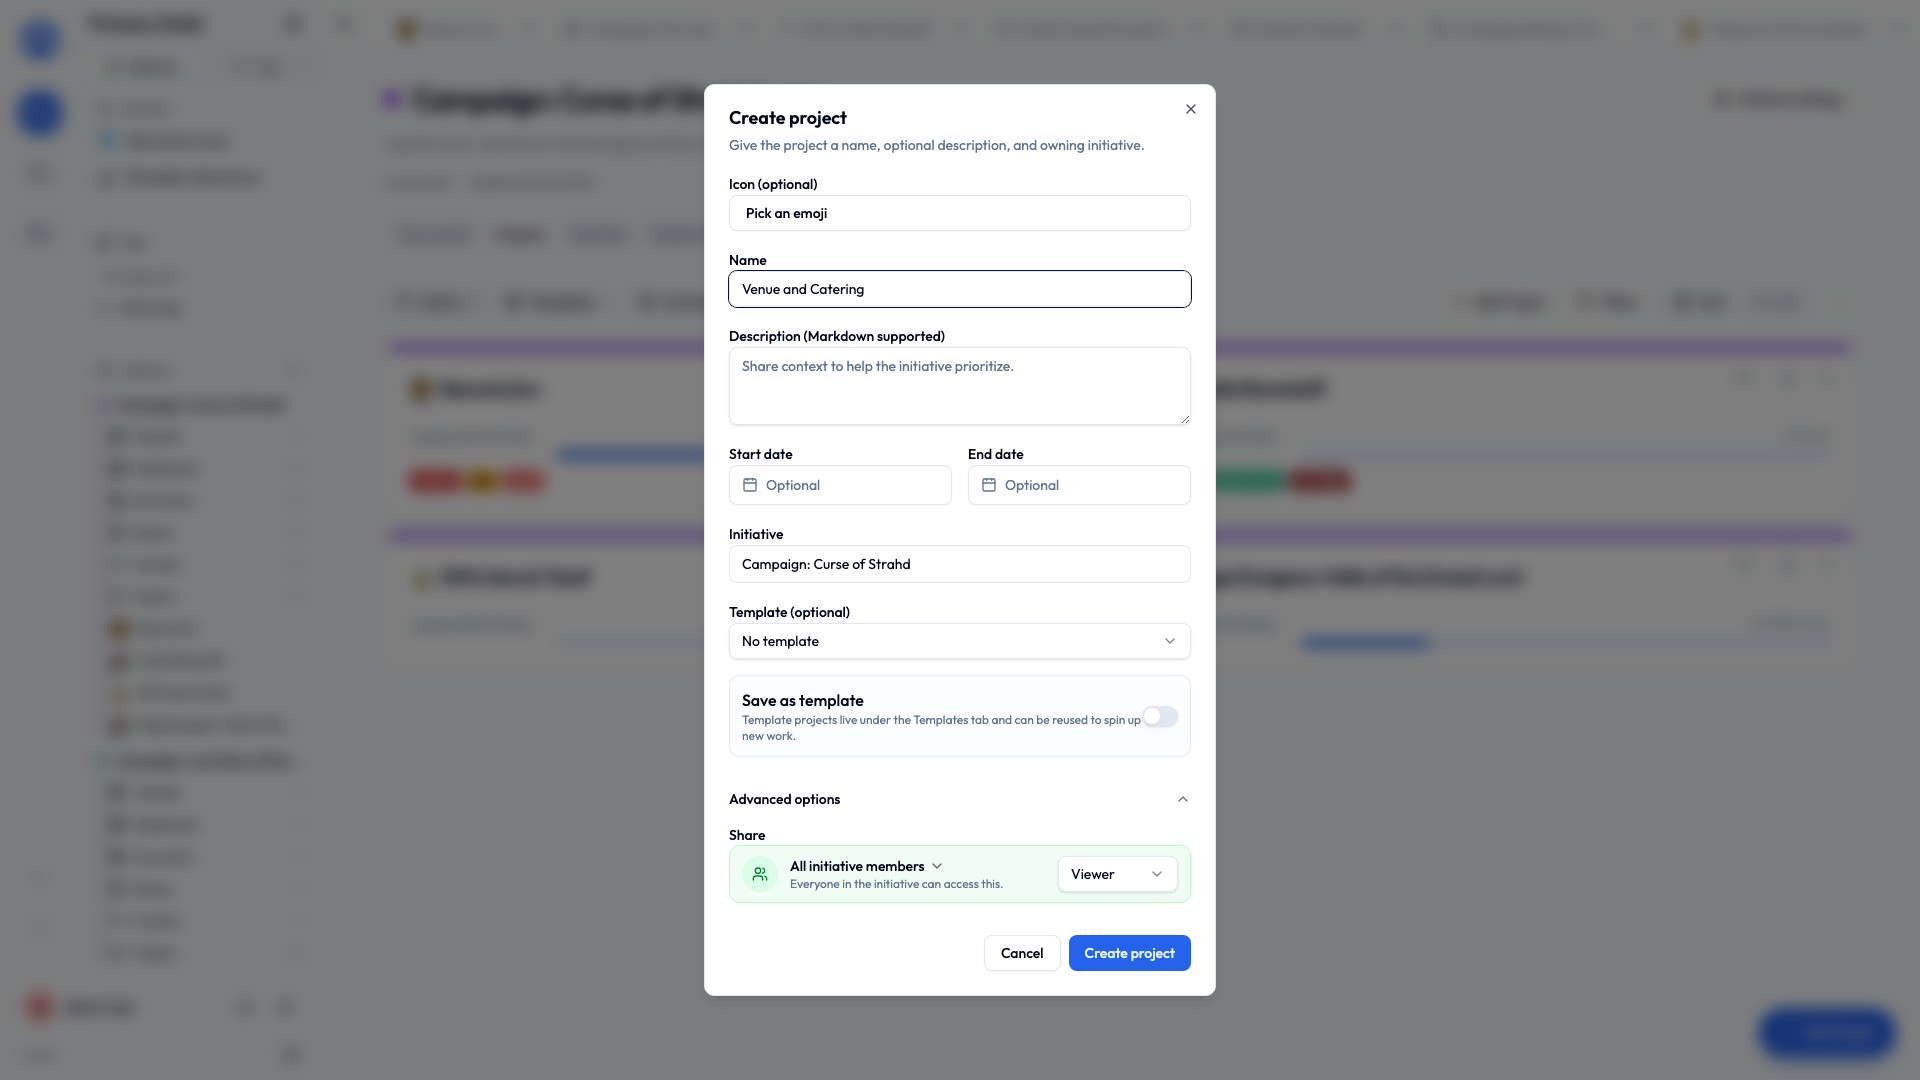
- Open the initiative you want the project in, and choose Create Project.
- Fill in:
- Project name (required).
- Icon — an optional emoji to make it easy to spot.
- Description — optional; simple Markdown formatting is supported.
- Initiative — which initiative it belongs to.
- Template — optionally start from a template (see Templates below).
- Create it. The board opens, ready for tasks.
Favorites and pinning
- Add to favorites (the star) puts a project in your Favorites list in the sidebar, for one-click access.
- Pin project keeps it near the top of its initiative.
Both are personal conveniences — they don't change anything for other people.
Adding tasks
Click Create task (or Add Task) on a project board. The quick form just needs a title to get going. Want more detail right away? Expand Advanced details to fill in the rest before saving.
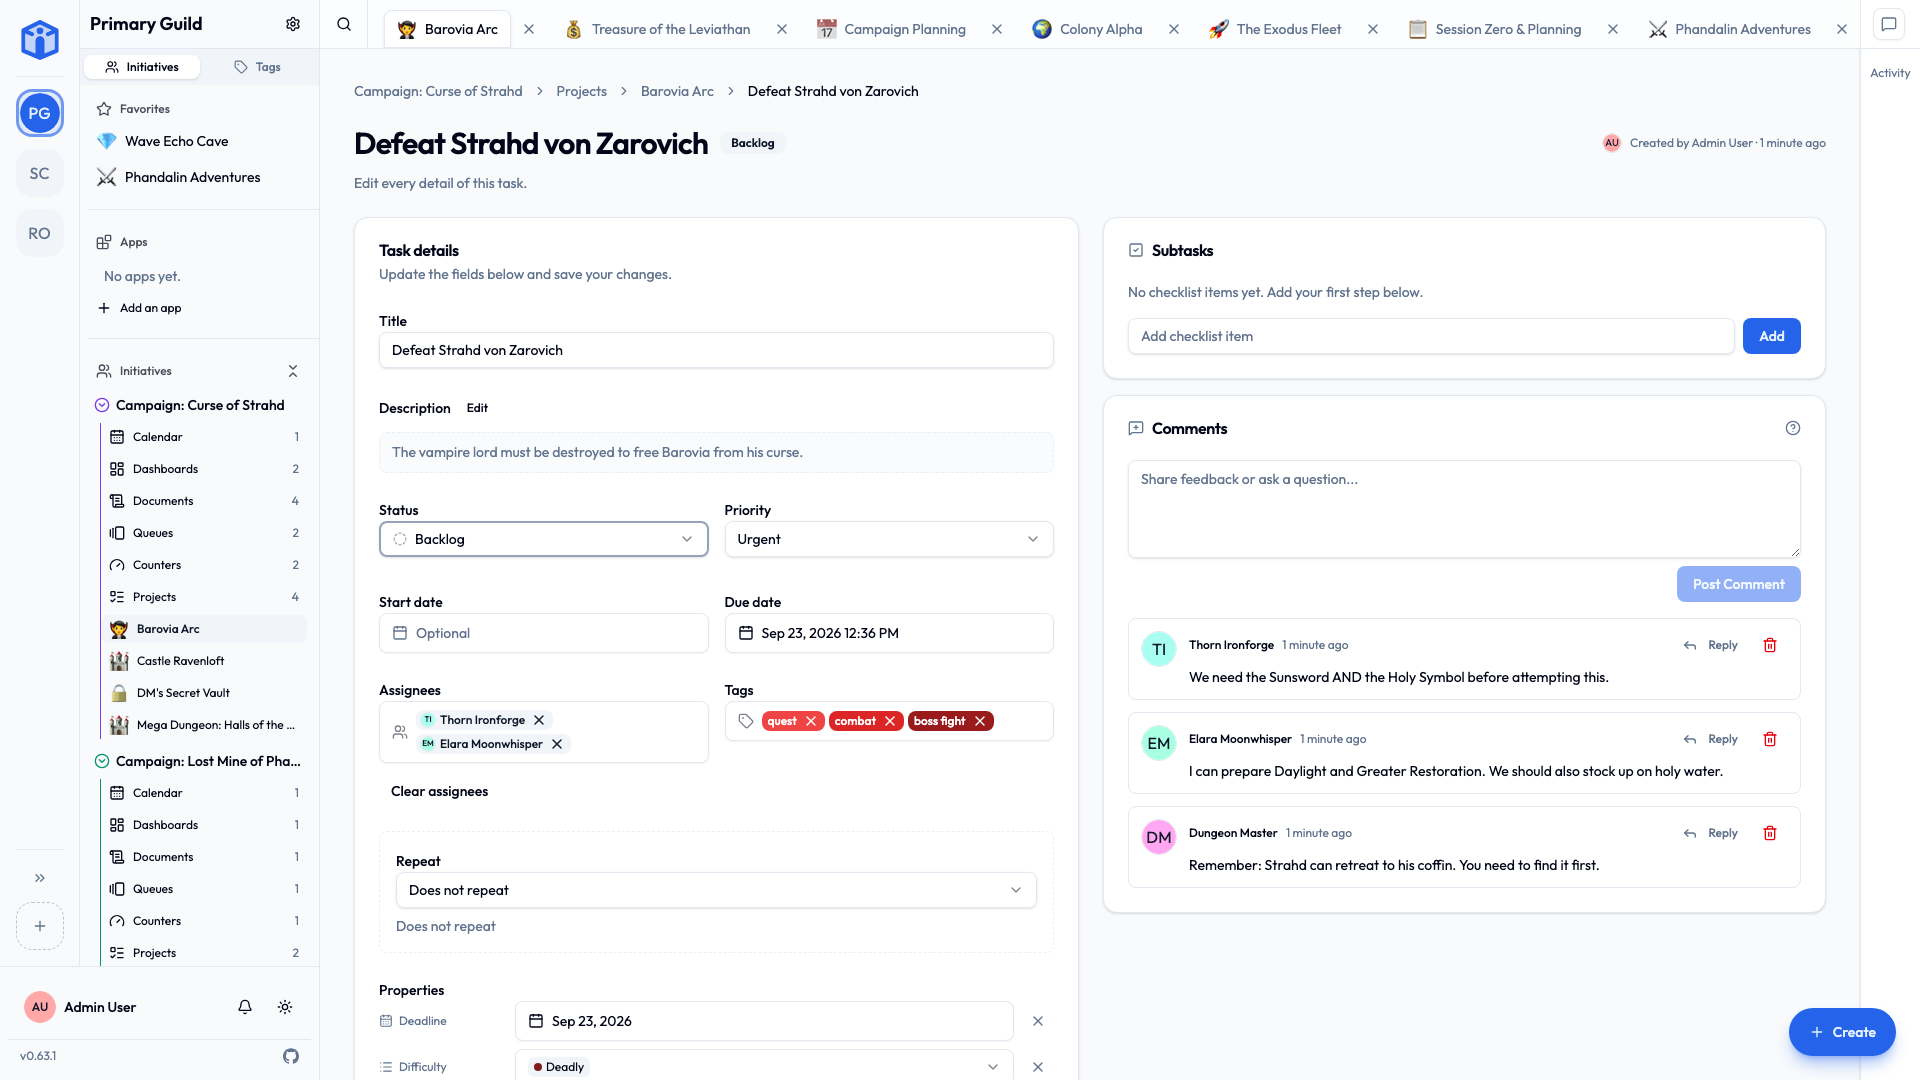
A task can hold:
| Field | What it's for |
|---|---|
| Title | A short name for the to-do (required). |
| Description | The details. Markdown is supported, with a Preview mode. |
| Status | Where it is in your workflow (see below). |
| Priority | Low, Medium, High, or Urgent. |
| Start date | When work should begin (optional). |
| Due date | When it's due (optional). |
| Assignees | One or more people responsible. |
| Subtasks | A checklist of smaller steps, with progress tracking. |
| Tags | Labels for grouping and filtering (see Tags). |
| Recurring | Make the task repeat on a schedule (see below). |
Statuses
Every project starts with four statuses, grouped into four stages:
Backlog → To Do → In Progress → Done
These are fully customizable per project — rename them, add your own, and give each an icon and color — from Project settings → Task statuses. Each status still belongs to one of the four stages, which is how features like "archive done tasks" know what "done" means.
Priority
Tasks can be Low, Medium, High, or Urgent, shown with a clear visual marker so the important things stand out at a glance.
Subtasks
Break a big task into a checklist of subtasks. As you tick them off, the task shows its progress (for example, "⅗ subtasks"). Subtasks are perfect for "before this is truly done, I need to do A, B, and C."
Recurring tasks
For things that come back around — a weekly report, a monthly review — set a task to repeat. You choose the rhythm:
- Daily
- Every weekday (Mon–Fri)
- Weekly on a chosen day
- Monthly on a chosen date
- Annually
- Or a custom pattern
You also choose when the next one appears: on a fixed schedule, or only after you complete the current one (good for chores that shouldn't pile up while you're away).
A little celebration
When you finish a task assigned to you, Initiative can give you a small moment of delight — confetti, a "+1 Heart," a "Natural 20," or gold coins. Choose your style (or turn it off) in User settings → Interface. There are optional sound and vibration cues too.
Organizing a busy board
When a project fills up, these tools keep it manageable:
- Filter by status, priority, assignee, due date, and more.
- Sort by any column. In the Table view, hold Shift and click more columns to sort by several at once.
- Group tasks by status, priority, or assignee.
- Select several tasks to act on them together — change their status, dates, assignees, priority, or tags in one go, or archive them.
Archive done tasks to declutter
Finished tasks don't have to be deleted. Archive them to clear the board while keeping the record. There's a one-click Archive done tasks action, and you can always filter to show archived tasks again.
Project settings
Open a project's settings for:
- Details — icon, name, description, and tags.
- Access — who can view or edit this project (see Sharing).
- Task statuses — customize the workflow.
- Advanced — save as a template, duplicate the project, archive/unarchive, or delete.
Moving a task to another project
You can move a task into a different project from its menu. One thing to know: because each project can have its own statuses, a moved task starts again at Backlog in its new home. Just set its new status afterward.
Templates
Set up a project the way you like it, then save it as a template (in Project settings → Advanced, or by ticking Save as template when creating one). Next time, start a new project from that template and skip the setup. Great for repeatable processes — every new client, event, or sprint starts identical.
Exporting a project
You can export a project (as a portable file) to keep an offline copy or move it elsewhere. It can be brought back in later, so it doubles as a backup of a single project.
Archiving and deleting
- Archive hides a finished project without losing anything; unarchive to bring it back.
- Delete sends it to the guild Trash, where an admin can restore it until the retention period passes.
Related
- Task views — Table, Kanban, and Calendar.
- Tags — labeling and filtering.
- Your space — see all your tasks across every project and guild.